Pics of my new bass

...and how to do so...
RELATED
PRODUCTS

Post

OK

Finally got around to making my Neck and Pickup template
(Pic shown from back side)
I also have the body template near complete

Will probably get the body cut within the next week

Image
Bunch O Stuff

Post

Update

I started cutting today. Routed out the neck pocket and all the pickups. That stuff looked good after some dremmel tool and filing. I mounted the body template I'll use to route the body outline. When making the body outline, I made a mistake. It's in the neck pocket. You can see it in the pic. I'll be able to recover from this though. I got a plan!!!

When starting to route the body outline, my router broke down, so I need to get a new router. Post another pic soon

Image
Bunch O Stuff

Post

Ouch, how are you going to fix that?

Nice wood btw.
Grtx, Marc Jacobi.
VST.NET | MIDI.NET

Post

obiwanjacobi wrote:Ouch, how are you going to fix that?
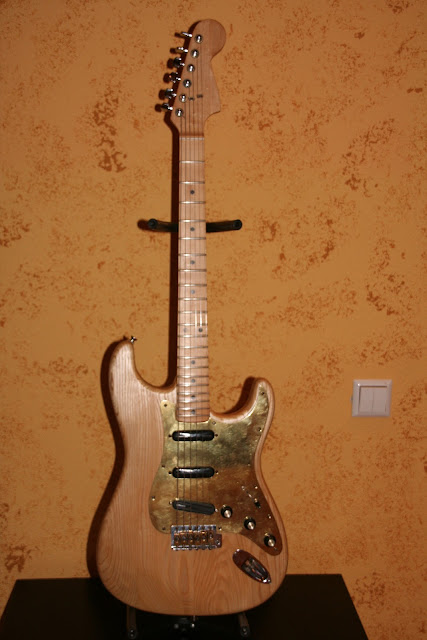
Nice wood btw.

It's not as bad as it looks. If you look at the pic, on the template, there's a perpendicular line to the center-line in the neck pocket area. That's the end of the neck pocket. The un-strainght portion in the route on the body blank was put there intentionally, to give me something to "eyeball" off of. It's past the cutoff for the neck. All I'll need to do is cut a straight line for about an inch or so. I'm debating on if I do it by hand or set up a fence. If I set up a fence, I'll do it from the backside.

When I cut the template, I knew I messed up the neck area. I really didn't want to remake the entire template, so I figured I'd correct it on the fly.

The wood is Oregon Black Walnut. I'm still unsure of how I'm going to finish. Nitrocellulose, or hand rubbed oil.
Bunch O Stuff

Post

I have one guitar that is fully done in Danish Oil (about 4 or 5 coats).

Image

And its wonderful on the neck. I have another guitar that is almost finished, built from parts that also has a neck with Danish Oil.

Finish the wood very fine (800 or 1000 grit) and rub the Danish Oil on it with a brush (cloth does not work as good for me). Then leave it a couple of minutes and then remove the excess oil with a cloth. If it is sticky, you've waited too long :hihi: Then wait 8 to 12 hours and repeat. For unfinished wood you should at least put 3 or 4 layers on. It will stink a little but that will wear off.

Downside is that the wood is not protected as well as with nitro.
Grtx, Marc Jacobi.
VST.NET | MIDI.NET

Post

Update

Got the body cut today. You can see in the photo, I've made the correction to my template. In the next day or so I'll be shaping the heel, routing out the control cavity, doing the tummy cut, and putting on the fillets. After that, alot of sanding

Cheers


Image
Bunch O Stuff

Post

Update

Routed off most of the fillets, put in the tummy cuts, and sanded down the edges. Will be working on shaping the heal, and routing out the control cavity soon.

Cheers


Image
Bunch O Stuff

Post

beautiful!
luv ur work

Post

Yes indeed. Very nice work!
Grtx, Marc Jacobi.
VST.NET | MIDI.NET

Post

Woow! it is coming out very well. it looks good

Cheers

Post

Thanks for all the comps!

Cheers

Scoops
Bunch O Stuff

Post

I'm Bummed!

After I took the pic last nite for posting here, I made a terrible discovery. There's a hairline crack along the grain, crossing nearly half the guitar. It didn't become visible until the wetting agent I use to show the grain dried off, but it didn't dry from the crack. If you are facing the guitar, it runs from where your right arm would rest on the body, diagonally through the bridge pickup, and then for another inch or so. At the end of the guitar, the crack is the entire thickness of the body

When I purchased the piece of wood, the sales person was very helpful in taking pics of the crack, and pointing it out to me. The sales person also said that this would probably sand out. From the very detailed pics, I thought the same.

Sometime the bastards win!

Just trying to figure out what I should do with this. Continue as if it were'nt there. Put a couple wood screws in through the bridge pickup cavity for strength. Use it for fire wood.

Just know my motivation has been reduced a bit.
Bunch O Stuff

Post

:-o
Is there no way you can 'wedge' it slightly open, inject some wood glue then clamp it up for a couple days?

Would be such a waste if you couldn't get past this :cry:

:wink:
James
---------------------------------------------
New Updated music site at - http://www.fraserology.com/music/

Post

offthewall wrote:Would be such a waste if you couldn't get past this :cry:
:-o

Post

Update

One of the things about working with wood is that there are ways to recover from mistakes, accidents, and the like.

In my case I have put a couple of 1.5 inch screws, traversing the crack, in through the bridge pickup cavity, so that the repair work won't be visible.

My main concern is that the string tension on the bridge will lift that section. The screws should minimize the lift.

This of course dictates that the guitar gets an oil finish. If I were to finish it in lacquer, and the wood shifted, the crack would be readily visible. An oil finish will minimize the visibility.

On to routing out the control cavity

Scoops
Bunch O Stuff

Post Reply

Return to “DIY: Build it and they will come”