Yeah, I pulled the FSR out of an old keybed, where it was used as an aftertouch strip. I tried running it under the soft pot to use it as a pressure control but I ran into some problems. The soft pot needs to be on a solid surface to work the way it should and the extra layer added by the FSR makes it too squishy. Also the FSR requires a lot more pressure when it's under the soft pot.
A coworker who used to work for Alesis gave me some touch sensors which were used to for the ribbons on the Andromeda A6. This touch sensor has two wipers where the maximum resistance is at opposite ends of the ribbon. They said that it should be possible to get position and pressure with this ribbon. I guess I need to use one of the wipers more like a voltage divider, or something.
Honestly, I'm pretty dumb with all this stuff. I'm just lucky to have found a lot of online resources to help me a long the way. I figure it could be useful to put all I've learned in one place, so others can benefit.

justin3am's DIY eurorack adventure (complete!)
-

- KVRAF
- Topic Starter
- 12352 posts since 7 May, 2006 from Southern California
-
- KVRist
- 353 posts since 15 Nov, 2005 from Melbourne Australia
Hey cool Idea, and nice score on the Andromeda Sensors!
I have a 'Controller' panel planned with a decent sized Ribbon, and some FSR's, some Arcade buttons and a joystick, can't wait to get it finished actually, but yeah I kind of gave up trying to work out how to get a pressure output from the Ribbon!
In the end I built Ian Fritz's simple circuit that just has a gate and position out, which I did on stripboard and it works fine... but now the typical GAS has kicked in and you've got me all interested in trying to get pressure back in haha
Do you know what those sensors are exactly?
-
- KVRAF
- 7540 posts since 7 Aug, 2003 from San Francisco Bay Area
I haven't used mine in quite a while, but I don't recall the strip on the Andromeda having pressure.
Incomplete list of my gear: 1/8" audio input jack.
-
- KVRAF
- Topic Starter
- 12352 posts since 7 May, 2006 from Southern California
On the Andromeda, the extra pin wasn't used for pressure, but it was suggested that it could be used that way. I'm going to struggle to describe this... on a three-pin touch sensor, the point of contact closest to the the ground pin (?) is the where the ribbon is considered to be touched. Because of this, a normal position sensor will work like lowest-note priority on a monophonic keyboard, if you touch two positions at once. In order to get something that works like last-note priority, you need two resistive elements. This way if you hold a position and then touch another place on the ribbon with another finger, either above or below the first position, you will get a new voltage for the last position which was touched. I'm not even sure if it was implemented that way on the Andromeda (I've only used one once or twice) but my coworker said that was the intention. Then again, I have a tendency to infer a lot due to my own ignorance.deastman wrote:I haven't used mine in quite a while, but I don't recall the strip on the Andromeda having pressure.
The ribbon was actually custom made for that product. From what I understand, FSRs and other touch sensors are made using a method very similar to making traces on a PCB. I wish it were a common part, as the sensors I have are longer than the width of my case.
-
- KVRAF
- 7540 posts since 7 Aug, 2003 from San Francisco Bay Area
The Andromeda does have two separate regions on the touch strip (left and right sides). I think they just read the resistance in opposite directions relative to the center tap, so it can differentiate between the two sides. Or something like that. But I still don't see how that could be used for pressure. For pressure, they normally layer an FSR underneath a resistor strip so you can get both at the same time. I haven't looked at it in a while, but I'm pretty sure the Doepfer one works that way.justin3am wrote:On the Andromeda, the extra pin wasn't used for pressure, but it was suggested that it could be used that way. I'm going to struggle to describe this... on a three-pin touch sensor, the point of contact closest to the the ground pin (?) is the where the ribbon is considered to be touched. Because of this, a normal position sensor will work like lowest-note priority on a monophonic keyboard, if you touch two positions at once. In order to get something that works like last-note priority, you need two resistive elements. This way if you hold a position and then touch another place on the ribbon with another finger, either above or below the first position, you will get a new voltage for the last position which was touched. I'm not even sure if it was implemented that way on the Andromeda (I've only used one once or twice) but my coworker said that was the intention. Then again, I have a tendency to infer a lot due to my own ignorance.deastman wrote:I haven't used mine in quite a while, but I don't recall the strip on the Andromeda having pressure.
The ribbon was actually custom made for that product. From what I understand, FSRs and other touch sensors are made using a method very similar to making traces on a PCB. I wish it were a common part, as the sensors I have are longer than the width of my case.
Incomplete list of my gear: 1/8" audio input jack.
-
- KVRAF
- Topic Starter
- 12352 posts since 7 May, 2006 from Southern California
I'm also having trouble understanding how a position sensor can be used as a pressure sensor but I was given a schematic to try, so I'll test it out tonight.
-
- KVRAF
- Topic Starter
- 12352 posts since 7 May, 2006 from Southern California
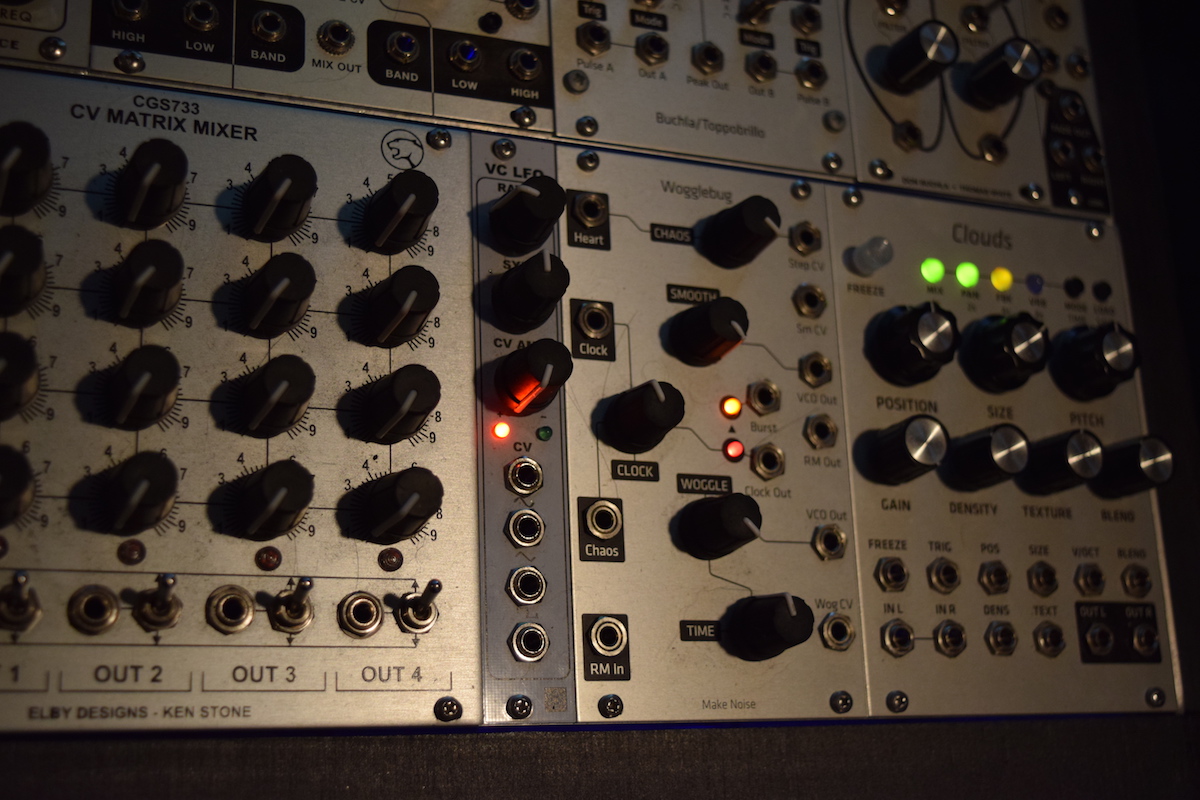
I'll have to get the rest of the pictures from my camera but here is one from my phone.
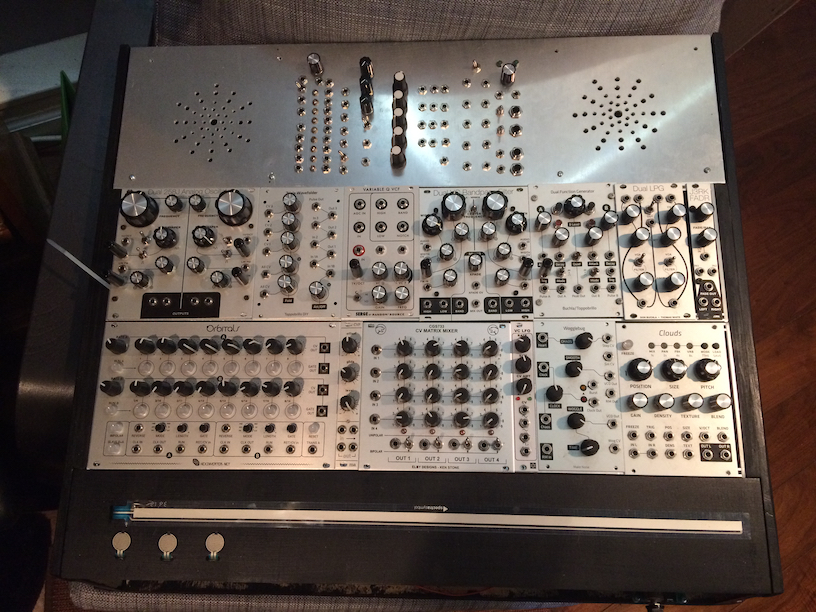
I still need to do the labels for the custom panel but after more than a year, I'm stoked to be so close to finishing this project!
I ended up using three pressure sensors independent of the ribbon sensor. Lots of fun to use them to control modulation amounts.
I still need to do the labels for the custom panel but after more than a year, I'm stoked to be so close to finishing this project!
I ended up using three pressure sensors independent of the ribbon sensor. Lots of fun to use them to control modulation amounts.
-
- KVRAF
- Topic Starter
- 12352 posts since 7 May, 2006 from Southern California
All done!


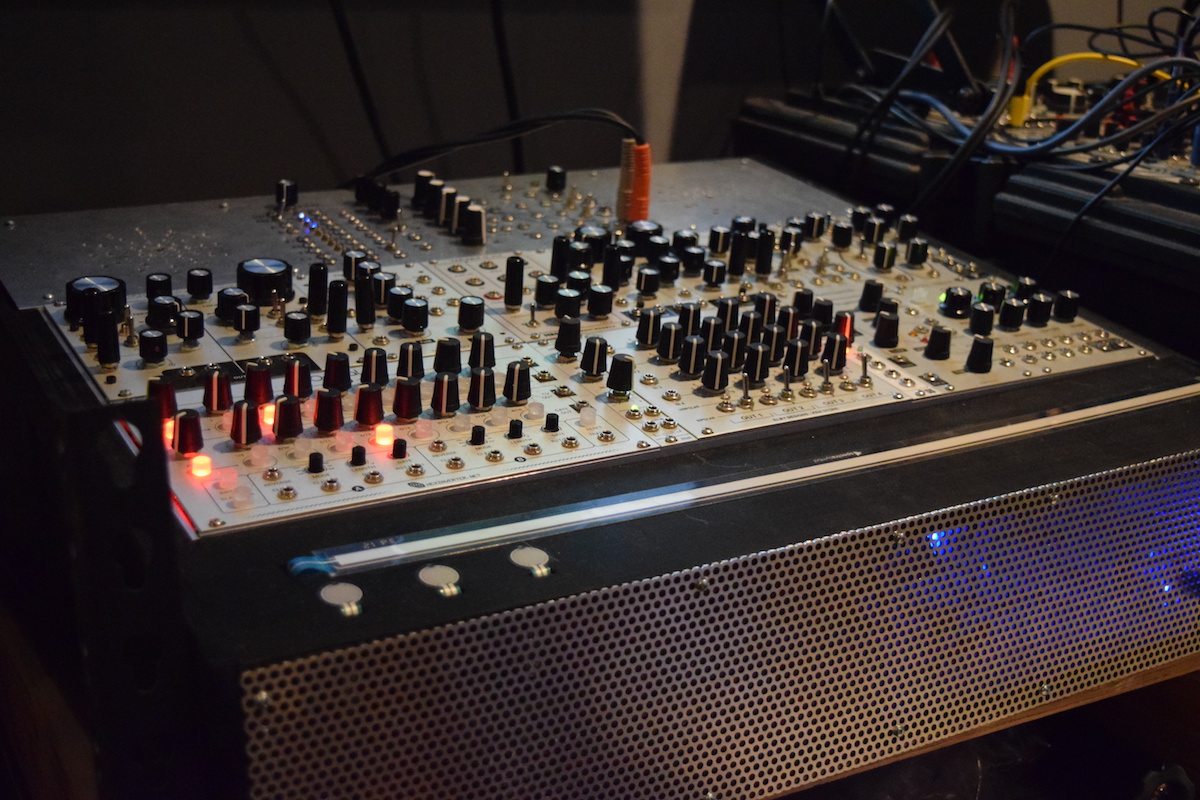

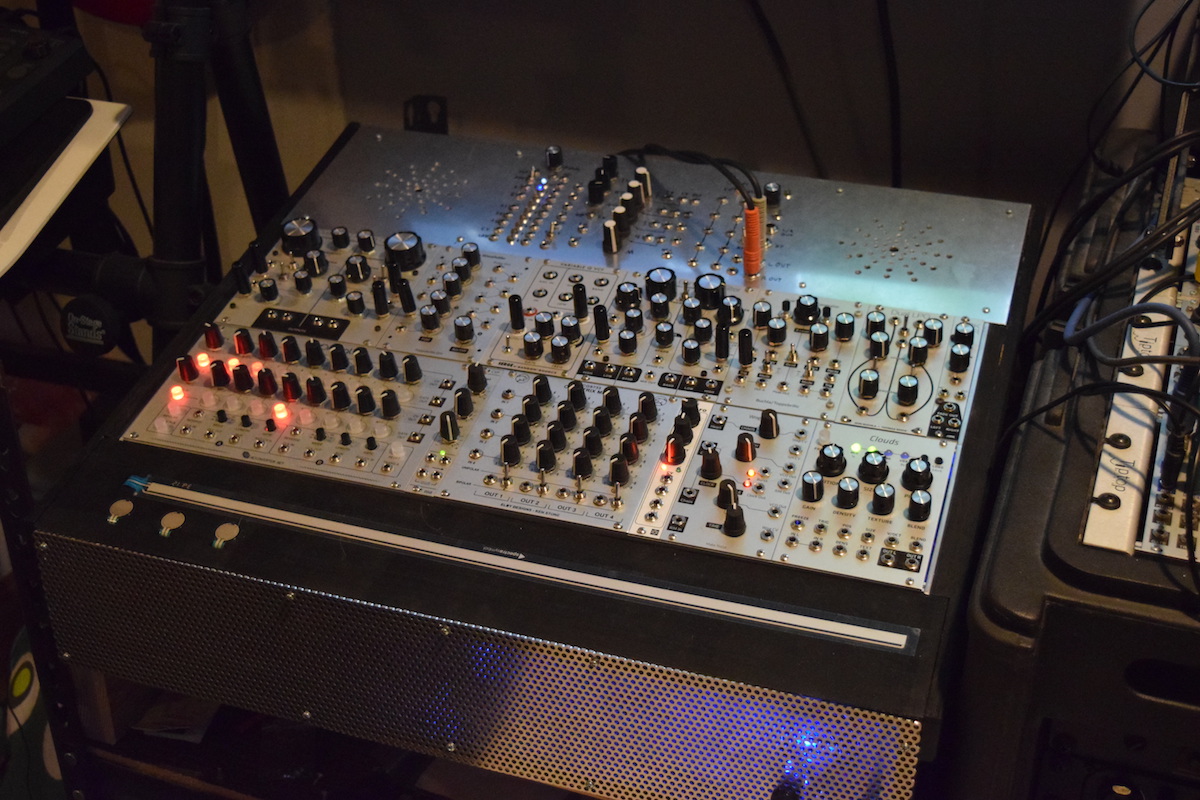


I haven't had a chance to wipe the panels down so there is some grime on them. Other than that, I think the project came out pretty well. Especially considering this was my first big woodworking project in 15 years!
Here is a quick and dirty video I put together last night, to celebrate... nothing special.
http://www.youtube.com/watch?v=rccqT2uFwYY
-

- Beware the Quoth
- 33152 posts since 4 Sep, 2001 from R'lyeh Oceanic Amusement Park and Funfair
Looks good, sir!
I finally sprung for a hot air station on account of this thread. Too many modules needing it these days (even one of the Sloth variants, FFS), finally decided I'd need to see if I could upgrade my soldering to 'silly microscopic' scale.
I finally sprung for a hot air station on account of this thread. Too many modules needing it these days (even one of the Sloth variants, FFS), finally decided I'd need to see if I could upgrade my soldering to 'silly microscopic' scale.
my other modular synth is a bugbrand
-
- KVRAF
- Topic Starter
- 12352 posts since 7 May, 2006 from Southern California
Thanks! I'm really proud of how it came out. The project now moves on to the next phase and I will have some announcements about that soon.
The hot air rework station is mostly useful for ICs, particually TQFP and QFN packages. Actaully the only time I use my rework station is when I need to remove an IC. The key to successful SMD work is flux and solder wick. If you just glob solder all over the pins and then use solder wick to remove the excess, you'll be good. I rarely even use my magnifiers for TQFPs anymore. Just look up videos about drag soldering. It makes things super easy.
When it comes to placing resistors and and caps and other really tiny parts, the hot air will just blow them away. I describe the way I learned to mount those parts on the previous page, where I documented building an O_C module. If you have some super fine point tweezers, the technique isn't much different from installing through hole parts.
My advice, always buy extra surface mount resistors/caps and diodes. You will lose some and you will never find them again.
-
- Beware the Quoth
- 33152 posts since 4 Sep, 2001 from R'lyeh Oceanic Amusement Park and Funfair
Yeah, its a combined iron/hot air setup. My previous iron didnt have a precise temperature control/readout, so this is a step up on that side anyway. But Ive always found an iron a bugger to deal with removing/reseating anything multipin anyway, from IC sockets to .1" connectors, and more than once Ive been stuffed because I couldnt do that particularly cleanly. Was time to expand the capabilities a bit. Made sure I picked up good tweezers, wick etc at the same time.justin3am wrote:Thanks! I'm really proud of how it came out. The project now moves on to the next phase and I will have some announcements about that soon.
The hot air rework station is mostly useful for ICs, particually TQFP and QFN packages. Actaully the only time I use my rework station is when I need to remove an IC. The key to successful SMD work is flux and solder wick. If you just glob solder all over the pins and then use solder wick to remove the excess, you'll be good. I rarely even use my magnifiers for TQFPs anymore. Just look up videos about drag soldering. It makes things super easy.
When it comes to placing resistors and and caps and other really tiny parts, the hot air will just blow them away. I describe the way I learned to mount those parts on the previous page, where I documented building an O_C module. If you have some super fine point tweezers, the technique isn't much different from installing through hole parts.
My advice, always buy extra surface mount resistors/caps and diodes. You will lose some and you will never find them again.
my other modular synth is a bugbrand
-
- KVRAF
- 1869 posts since 21 Feb, 2004 from somewhere! anywhere!
Congratulations on the completion! Looks and sounds great.
I've enjoyed this thread a great deal and have become very interested in the use of sensors. I checked out the sample & hold circuit you linked to as I was tinkering with the idea of adding something similar to my softpot but, as previously mentioned, my applications are more akin to junior (or elementary) school science projects. In the end, I decided it was a challenge too far and just built a simple oscillator for sound effect purposes.
What's next?
-
- KVRAF
- Topic Starter
- 12352 posts since 7 May, 2006 from Southern California
Thanks!

I'll be installing a level 2 charging station in our garage for my wife's new electric car.
As far as music electronics... I might do a 4U Serge panel. I have a bunch of the new CEM3340s, a bunch of V2164s, a few more teensy 3.1s and some fancy 16bit DACs. I've got a bunch of stuff for circuit bending. Lots of ideas but no where near enough time.
If I had to do it again, I'd go the arduino route. Doing all that BS on perfboard wasn't fun. I might make a standalone touch controller with MIDI, like a DIY version of the Doepfer R2M. I have a bunch more ribbons.knockman wrote:I checked out the sample & hold circuit you linked to as I was tinkering with the idea of adding something similar to my softpot but, as previously mentioned, my applications are more akin to junior (or elementary) school science projects. In the end, I decided it was a challenge too far and just built a simple oscillator for sound effect purposes.
Uh, I should probably do some music.knockman wrote:What's next?
I'll be installing a level 2 charging station in our garage for my wife's new electric car.
As far as music electronics... I might do a 4U Serge panel. I have a bunch of the new CEM3340s, a bunch of V2164s, a few more teensy 3.1s and some fancy 16bit DACs. I've got a bunch of stuff for circuit bending. Lots of ideas but no where near enough time.
-
- KVRAF
- 5818 posts since 9 Jul, 2002 from Helsinki
This is fantastic thread, thanks for all the write-ups and congratulations on a massively impressive instrument!
I wish I could convince myself that starting a modular would benefit my music in some intangible way. I've gotten my feet wet with DIY, built an Objective2 headphone amp, and I loved it. Building module kits is a hugely inviting idea, but something usable is still at least around 1500eur. How do you find your modular(s) as instrument, do they add something to your creative process that other things can't? I don't mean the features and sound (I've explored this for the past year more than I care to admit, and Reaktor Blocks is my main tool) so much as the artistic, mental side of things.
I wish I could convince myself that starting a modular would benefit my music in some intangible way. I've gotten my feet wet with DIY, built an Objective2 headphone amp, and I loved it. Building module kits is a hugely inviting idea, but something usable is still at least around 1500eur. How do you find your modular(s) as instrument, do they add something to your creative process that other things can't? I don't mean the features and sound (I've explored this for the past year more than I care to admit, and Reaktor Blocks is my main tool) so much as the artistic, mental side of things.
-
- KVRAF
- Topic Starter
- 12352 posts since 7 May, 2006 from Southern California
Yes, for me working with a hardware modular is different than working with almost any other kind of instrument. But it took me a while before I could call my modular an instrument. I think when you get started there are a lot of moments inspiration and happy accidents happening. Many of the people who start a modular system, don't get past that honeymoon period because it can take years to really learn the instrument. It can also take several years before you get to the point where the modular feels like an instrument. Lots of trial and error and experimenting with modules which may have little to no documentation. It can be very challenging but also very rewarding once everything starts falling into place.
Get into DIY because you love building stuff, don't do it if you just want a cheaper path into modular synths. Do it because you enjoy an adventure, don't do it if you are looking for a specific destination. If you treat it like a learning experience, you will have a lot of fun. If you treat a project as something that must be done in order to start making sound, you will likely find it very frustrating.
There are lots of great projects on the Thonk website, most are very well documented. Clicks & Clocks has you covered for building a rack and power distribution.