


How to understand compression better
-
- KVRer
- 11 posts since 18 Feb, 2023
I am a vocalist and producer who needs some tips on how to understand compression for vocals better, can anyone give some tips on how to understand how to use compression better?
-

- KVRian
- 529 posts since 2 Sep, 2012
This video may help you some, then you can do the same with your vocals to help hear what the compressor is doing at different settings. Otherwise, it’s practice and listening deeply really. Maybe try loading some ‘vocal’ presets with your chosen compressor as well though, assuming some are included.
-

- KVRist
- 344 posts since 16 Nov, 2007
Sure:DawsonHendrix wrote: Fri Mar 03, 2023 2:19 pm I am a vocalist and producer who needs some tips on how to understand compression for vocals better, can anyone give some tips on how to understand how to use compression better?
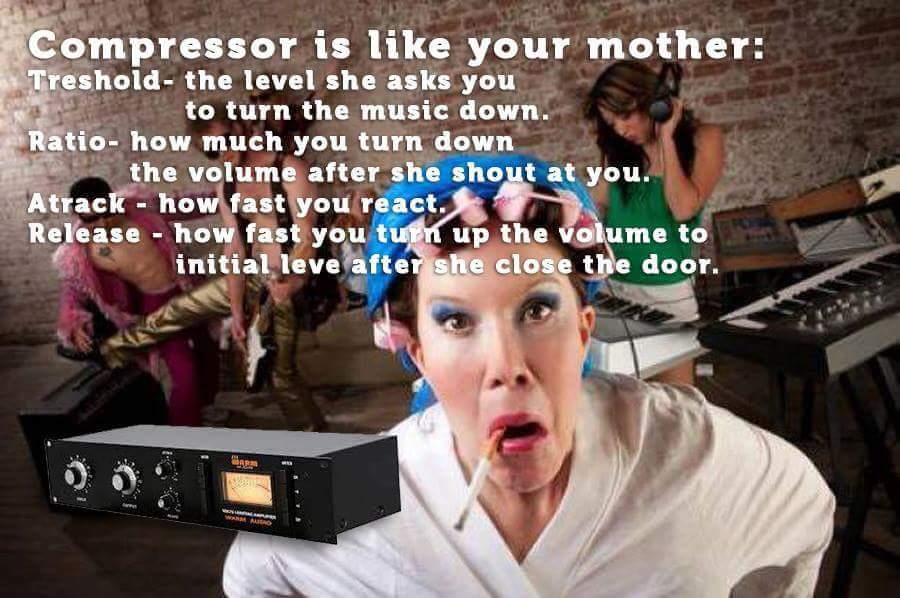
mnemonics are important in learning
 and then praxis praxis praxis
-
- KVRAF
- 4720 posts since 26 Nov, 2015 from Way Downunder
Hahaha love itG-Sonique wrote: Fri Mar 03, 2023 4:02 pmSure:DawsonHendrix wrote: Fri Mar 03, 2023 2:19 pm I am a vocalist and producer who needs some tips on how to understand compression for vocals better, can anyone give some tips on how to understand how to use compression better?
mnemonics are important in learning
-
- KVRian
- 818 posts since 15 Jun, 2018
The first goal of compression is to make quieter parts of a recording more audible.
Say you have recorded the phrase "I love trains". And "trains" is quieter than the rest. Which makes it hard to hear it in a full song. A compressor would squeeze "I love" (ratio says how much, attack says how fast when it gets loud, release says how fast compressor lets go). Then you would compensate with the parameter gain/makeup, making the complete recording louder. And trains more audible.
The second goal is tonal shaping. Most analog compressors in a studio not only did the job if what I just described, they changed the sound of the recording because if their analog(u)e circuit. Similar to how an amp changes the sound of a clean guitar, just much more subtle. That's why many plugins are modeled after analog(u)e compressors like the 1176 or the LA2A. You'd reach for these, because when compressing, they also make the sound warmer and fuller.
If you want to "learn" compression", put a compressor onto a vocal track, turn the ratio all the way up and the threshold all the way down (make sure no AUTO function is enabled, because it might get really loud!), Attack and Release all the way to slowest. Then play your recording (never in solo, always with the track behind it) and slowly start turning Attack and then Release. Listen to how the vocal's sound changes. Then change the ratio, 4:1 or 3:1 is a good place to start. Then adapt the threshold. If there is a meter that shows gain reduction, aim for no more than 5dB. Finally adapt makeup gain to what the compressor is taking away. So if your meter maxes out at 5dB, add 5dB.
Say you have recorded the phrase "I love trains". And "trains" is quieter than the rest. Which makes it hard to hear it in a full song. A compressor would squeeze "I love" (ratio says how much, attack says how fast when it gets loud, release says how fast compressor lets go). Then you would compensate with the parameter gain/makeup, making the complete recording louder. And trains more audible.
The second goal is tonal shaping. Most analog compressors in a studio not only did the job if what I just described, they changed the sound of the recording because if their analog(u)e circuit. Similar to how an amp changes the sound of a clean guitar, just much more subtle. That's why many plugins are modeled after analog(u)e compressors like the 1176 or the LA2A. You'd reach for these, because when compressing, they also make the sound warmer and fuller.
If you want to "learn" compression", put a compressor onto a vocal track, turn the ratio all the way up and the threshold all the way down (make sure no AUTO function is enabled, because it might get really loud!), Attack and Release all the way to slowest. Then play your recording (never in solo, always with the track behind it) and slowly start turning Attack and then Release. Listen to how the vocal's sound changes. Then change the ratio, 4:1 or 3:1 is a good place to start. Then adapt the threshold. If there is a meter that shows gain reduction, aim for no more than 5dB. Finally adapt makeup gain to what the compressor is taking away. So if your meter maxes out at 5dB, add 5dB.
-
- KVRer
- 2 posts since 18 Feb, 2023
what helped me a lot is to use dedicated compressors like a la2a or 1176 or a 4000 g vca. Most of the time they have less options than a digital (stock) compressor, which helps me to get faster results and learn the different sounds and uses of a compressor.
-
 Scrubbing Monkeys Scrubbing Monkeys https://www.kvraudio.com/forum/memberlist.php?mode=viewprofile&u=397259
 - KVRAF
- 1839 posts since 21 Apr, 2017 from Bahia, Brazil
Oh my friend what an interesting journey you are on.
All of the advice above is worthy. I started my quest of really diving deep into compression after failing a simple test as I was applying for a live sound gig. The guy simply asked me ....what compression setting would you use for lead vocal.........I had no freaking clue. I was embarrassed. He kindly explained that he would use a 4:1 ratio with 30ms attack and then set the release about 3 times that. 4:1 ratio because it will grab the peaks but not too much. 30ms attack so as not to squash the initial transient and a long enough release that you dont get noticeable pumping. Then he told me I was not the guy for the job. This was 1988. From that moment on I seized any opportunity to learn more about compression. Moving forward to 2023. I still spend a good amount of time really getting a feel for different compressors (vst) and their style. The typical suspects mentioned above are great for fast results. however comps like Reacomp (free), Dc8c3 and Kotelnikov (free) dive a bit deeper and are fun to play around with. Also experiment with different elements like snare, kick, bass and even synths. Use an O scope on the input as well as output to see what is happening to the wave form......Lots of fun ahead...
All of the advice above is worthy. I started my quest of really diving deep into compression after failing a simple test as I was applying for a live sound gig. The guy simply asked me ....what compression setting would you use for lead vocal.........I had no freaking clue. I was embarrassed. He kindly explained that he would use a 4:1 ratio with 30ms attack and then set the release about 3 times that. 4:1 ratio because it will grab the peaks but not too much. 30ms attack so as not to squash the initial transient and a long enough release that you dont get noticeable pumping. Then he told me I was not the guy for the job. This was 1988. From that moment on I seized any opportunity to learn more about compression. Moving forward to 2023. I still spend a good amount of time really getting a feel for different compressors (vst) and their style. The typical suspects mentioned above are great for fast results. however comps like Reacomp (free), Dc8c3 and Kotelnikov (free) dive a bit deeper and are fun to play around with. Also experiment with different elements like snare, kick, bass and even synths. Use an O scope on the input as well as output to see what is happening to the wave form......Lots of fun ahead...
We jumped the fence because it was a fence not be cause the grass was greener.
https://scrubbingmonkeys.bandcamp.com/
https://sites.google.com/view/scrubbing-monkeys
https://scrubbingmonkeys.bandcamp.com/
https://sites.google.com/view/scrubbing-monkeys
-

- KVRAF
- 25037 posts since 12 Jul, 2003 from West Caprazumia
The Focusrite Fast Compressor shows what compression is and does better than most everything else I think. Its analyzer displays in realtime both in- and output, threshold, ratio, knee, attack and release as a waveform laid over that of the unprocessed signal.
It really does a fantastic job there.
It really does a fantastic job there.
-
vitocorleone123 vitocorleone123 https://www.kvraudio.com/forum/memberlist.php?mode=viewprofile&u=333504
- KVRAF
- 2504 posts since 30 Jun, 2014 from Pacific NW
Even though it’s for KGE, this video also has some good basic info.
-
Winstontaneous Winstontaneous https://www.kvraudio.com/forum/memberlist.php?mode=viewprofile&u=98336
- KVRAF
- 2593 posts since 15 Feb, 2006 from Another Green World
Gregg Janman (Hermetech Mastering)'s guide to compression is as good as any I've seen. Snipped from the linked page:
"
Using A Compressor
One of the questions I see a lot is how to use a compressor in mastering. Of course, nothing beats a lot of time spent using a particular compressor on many different tracks to get a feel for it, but there are some techniques that can help to speed up the process. This is not the only way, but it's one that works for me, after a lot of trial and error, and if you are mastering for punch/clarity/"glue" etc., as opposed to just squash. I will say upfront that it is almost completely paraphrased from Michael Paul Stavrou's excellent book, 'Mixing WIth Your Mind', which despite some now outdated sections on digital audio, is one of the best recording books I have ever read.
So, here's the technique: First choose a basic stereo compressor and an unmastered, highish tempo, steadily rhythmic track (e.g. something Disco, House or Techno etc).
1) Set the main controls like this: Attack as short as it will go. Release as short as it will go. Ratio as high as it will go. Threshold/Input Gain depends on the compressor type, but basically be smashing it as hard as you can. It sounds really bad, right?
2) Now start tweaking the Attack control and listen to the attack of the transients on the kicks, snares, bass line, arpeggios or whatever. You should be able to find a nice spot where it really lets the transients 'thwap' through whilst clamping down on everything else. Use your ears. Where does it sound best? Less snap and more smash = shorter Attack, more snap and less smash = longer Attack. I can usually find a sweet spot very quickly. I usually err on the side of a little too short rather than a little too long. Don't touch the Attack again, you are done there. It still sounds really rubbish though, doesn't it?
3) Move on to the Release control. We are now at the real magick. What you are looking for here is an indefinable certain something that grooves. Again, use your ears. Might be best left at minimum, might sound good thinking about the tempo of the track, so it clamps down and swings back just before the next kick (although it might not...), it might want even longer than that for a volume wave/RMS/loudness levelling like function that just "feels" right and rides the groove. It's the ineffable control, but the most important for adding feel. So use your ears, not your eyes, not your screen, not your meters, not the compressor markings, just your ears. When you are happy, don't touch the Release again, leave it, you are done there.
4) If the comp has a HPF in the sidechain, I usually play with it here. On full band tracks I usually find somewhere between about 60-300Hz will work to stop those kicks and bass lines pulling things down too much, but I'll also usually go back and tweak this again later. I almost always have the HPF in the sidechain for mastering compression, very rarely off altogether. It really adds to compression transparency. 'Suck, Thwap, Suck, Thwack', it still sounds bad, even though it's now "bouncing" along nicely with the music.
5) Move on to the Ratio control. Bring the Ratio control down as far as you possibly can, all the way if possible, until that groove you have established becomes almost subliminal. Mastering ratios are often very low, like 1.1:1 or 1.5:1, very rarely more than 2.0:1. You've now got that groove sounding really nice!
6) Threshold or Input Gain should be set so that the amount of Gain Reduction is never clearly audible. Try not to do more than about 1.5-3dB of Gain Reduction on the highest peaks. You have added a subliminal certain something to the snap and groove that the artist will hopefully appreciate. If they had wanted an obvious 'Suck & Thwap', they would have done it themselves, or asked you to do it. If they did ask you, that's great, go ahead and slam it a little more by lowering the threshold, pushing the input gain harder, or raising the Ratio back up.
7) It should hopefully now sound much better, have a certain 'je ne sais quoi', glue, warmth, togetherness blah blah blah when you A/B it with the original track. You are done!
Notes: Play with the compressors' extra controls, as they all work and sound slightly different. My Chandler Germanium compressors are great because they also contain two input and two output transformers you can gain stage for more or less saturation, and an output gain with feedback control to adjust the type of 'colour'. They also offer six different transfer curves/knee types, I usually use the two or three widest knee types as they are the most transparent/least "grabby". I also have a "Clean/Dirty" switch which changes the amount of harmonic distortion the gain reduction causes. Usually Clean, but sometimes Dirty can be just what the doctor ordered.
I hope that was somewhat helpful. Feel free to post any comments or alternative ways of working, I'd love to hear feedback!
"
"
Using A Compressor
One of the questions I see a lot is how to use a compressor in mastering. Of course, nothing beats a lot of time spent using a particular compressor on many different tracks to get a feel for it, but there are some techniques that can help to speed up the process. This is not the only way, but it's one that works for me, after a lot of trial and error, and if you are mastering for punch/clarity/"glue" etc., as opposed to just squash. I will say upfront that it is almost completely paraphrased from Michael Paul Stavrou's excellent book, 'Mixing WIth Your Mind', which despite some now outdated sections on digital audio, is one of the best recording books I have ever read.
So, here's the technique: First choose a basic stereo compressor and an unmastered, highish tempo, steadily rhythmic track (e.g. something Disco, House or Techno etc).
1) Set the main controls like this: Attack as short as it will go. Release as short as it will go. Ratio as high as it will go. Threshold/Input Gain depends on the compressor type, but basically be smashing it as hard as you can. It sounds really bad, right?
2) Now start tweaking the Attack control and listen to the attack of the transients on the kicks, snares, bass line, arpeggios or whatever. You should be able to find a nice spot where it really lets the transients 'thwap' through whilst clamping down on everything else. Use your ears. Where does it sound best? Less snap and more smash = shorter Attack, more snap and less smash = longer Attack. I can usually find a sweet spot very quickly. I usually err on the side of a little too short rather than a little too long. Don't touch the Attack again, you are done there. It still sounds really rubbish though, doesn't it?
3) Move on to the Release control. We are now at the real magick. What you are looking for here is an indefinable certain something that grooves. Again, use your ears. Might be best left at minimum, might sound good thinking about the tempo of the track, so it clamps down and swings back just before the next kick (although it might not...), it might want even longer than that for a volume wave/RMS/loudness levelling like function that just "feels" right and rides the groove. It's the ineffable control, but the most important for adding feel. So use your ears, not your eyes, not your screen, not your meters, not the compressor markings, just your ears. When you are happy, don't touch the Release again, leave it, you are done there.
4) If the comp has a HPF in the sidechain, I usually play with it here. On full band tracks I usually find somewhere between about 60-300Hz will work to stop those kicks and bass lines pulling things down too much, but I'll also usually go back and tweak this again later. I almost always have the HPF in the sidechain for mastering compression, very rarely off altogether. It really adds to compression transparency. 'Suck, Thwap, Suck, Thwack', it still sounds bad, even though it's now "bouncing" along nicely with the music.
5) Move on to the Ratio control. Bring the Ratio control down as far as you possibly can, all the way if possible, until that groove you have established becomes almost subliminal. Mastering ratios are often very low, like 1.1:1 or 1.5:1, very rarely more than 2.0:1. You've now got that groove sounding really nice!
6) Threshold or Input Gain should be set so that the amount of Gain Reduction is never clearly audible. Try not to do more than about 1.5-3dB of Gain Reduction on the highest peaks. You have added a subliminal certain something to the snap and groove that the artist will hopefully appreciate. If they had wanted an obvious 'Suck & Thwap', they would have done it themselves, or asked you to do it. If they did ask you, that's great, go ahead and slam it a little more by lowering the threshold, pushing the input gain harder, or raising the Ratio back up.
7) It should hopefully now sound much better, have a certain 'je ne sais quoi', glue, warmth, togetherness blah blah blah when you A/B it with the original track. You are done!
Notes: Play with the compressors' extra controls, as they all work and sound slightly different. My Chandler Germanium compressors are great because they also contain two input and two output transformers you can gain stage for more or less saturation, and an output gain with feedback control to adjust the type of 'colour'. They also offer six different transfer curves/knee types, I usually use the two or three widest knee types as they are the most transparent/least "grabby". I also have a "Clean/Dirty" switch which changes the amount of harmonic distortion the gain reduction causes. Usually Clean, but sometimes Dirty can be just what the doctor ordered.
I hope that was somewhat helpful. Feel free to post any comments or alternative ways of working, I'd love to hear feedback!
"
-

- GRRRRRRR!
- 17856 posts since 14 Jun, 2001 from Somewhere you're not!
I'm a big believer in learning by doing so I think the best way to learn what compression does is to use it on some audio clips in an audio editor like Audition or SoundForge or Ocen Audio (which is free and pretty good). Because it does destructive editing, you'll be able to see what the audio looks like before and after - just keep toggling undo/redo - for different settings.
The thing I'd keep in mind, though, is that it's not some black art, it's a very simple thing to understand. Obviously, if you're trying to make a living from YouTube, it's in your best interest to make everything seem as difficult as possible. That doesn't mean any of it is actually difficult, though, so don't over-think it.
The thing I'd keep in mind, though, is that it's not some black art, it's a very simple thing to understand. Obviously, if you're trying to make a living from YouTube, it's in your best interest to make everything seem as difficult as possible. That doesn't mean any of it is actually difficult, though, so don't over-think it.
NOVAkILL : Legion GO, AMD Z1x, 16GB RAM, Win11 | Audient EVO 8 | Lumi Keys | Studio Pro 8
Korg Odyssey, bx-oberhausen, Proxima, PolyMax, GR8, JP6K, Union, Atomika,
Invader 2, Flow Motion, Olga, TRK 01, Thorn, Spire, VG Iron
Korg Odyssey, bx-oberhausen, Proxima, PolyMax, GR8, JP6K, Union, Atomika,
Invader 2, Flow Motion, Olga, TRK 01, Thorn, Spire, VG Iron
-
- KVRAF
- 25037 posts since 12 Jul, 2003 from West Caprazumia
As I mentioned a few posts above yours, the Focusrite Fast Compressor does exactly that in realtime right in your host whereever you want it - colour-coded with both waveforms shown at once so it's much much easier to see the actual change. The demo will do just fine for that.BONES wrote: Mon Mar 06, 2023 2:10 am I'm a big believer in learning by doing so I think the best way to learn what compression does is to use it on some audio clips in an audio editor like Audition or SoundForge or Ocen Audio (which is free and pretty good). Because it does destructive editing, you'll be able to see what the audio looks like before and after - just keep toggling undo/redo - for different settings.
-

- KVRAF
- 7734 posts since 2 Sep, 2019
Or you could use a plugin like Wave Observer in your DAW. It’s free.BONES wrote: Mon Mar 06, 2023 2:10 am I'm a big believer in learning by doing so I think the best way to learn what compression does is to use it on some audio clips in an audio editor like Audition or SoundForge or Ocen Audio (which is free and pretty good). Because it does destructive editing, you'll be able to see what the audio looks like before and after - just keep toggling undo/redo - for different settings.
https://pressplay-music.com/wave-observer/
THIS MUSIC HAS BEEN MIXED TO BE PLAYED LOUD SO TURN IT UP
-
- GRRRRRRR!
- 17856 posts since 14 Jun, 2001 from Somewhere you're not!
Maybe but not so easy to know what the settings are in that particular plugin. The reason I suggested an audio editor is that their compressors tend to be more standard affairs, with all the usual parameters and not a lot of extra bullshit to confuse the situation.jens wrote: Mon Mar 06, 2023 3:45 amAs I mentioned a few posts above yours, the Focusrite Fast Compressor does exactly that in realtime right in your host whereever you want it - colour-coded with both waveforms shown at once so it's much much easier to see the actual change.
Seems like a lot of hassle to me. An audio editor is a much simpler environment that allows people to concentrate better on what they are doing. It's open a file and add compression, versus create a new project, add an audio track, add a compressor effect and than add Wave Observer, then work out how you can see both at once so you can play around with it effectively.jamcat wrote: Mon Mar 06, 2023 3:50 amOr you could use a plugin like Wave Observer in your DAW. It’s free.
See, this is exactly why you guys end up with 50 f**king tracks in your mixes - you don't even think about efficiency. Your solution to everything is just to pile on more effects. It's nuts.
NOVAkILL : Legion GO, AMD Z1x, 16GB RAM, Win11 | Audient EVO 8 | Lumi Keys | Studio Pro 8
Korg Odyssey, bx-oberhausen, Proxima, PolyMax, GR8, JP6K, Union, Atomika,
Invader 2, Flow Motion, Olga, TRK 01, Thorn, Spire, VG Iron
Korg Odyssey, bx-oberhausen, Proxima, PolyMax, GR8, JP6K, Union, Atomika,
Invader 2, Flow Motion, Olga, TRK 01, Thorn, Spire, VG Iron
-
- KVRAF
- 7734 posts since 2 Sep, 2019
I’m thinking more about seeing what compression (or any effect) is doing to your track in real-time, as you make adjustments, in the environment you’re already working in. I think it’s easy enough to have 2 plugins open at the same time.BONES wrote: Mon Mar 06, 2023 4:21 amSeems like a lot of hassle to me. An audio editor is a much simpler environment that allows people to concentrate better on what they are doing. It's open a file and add compression, versus create a new project, add an audio track, add a compressor effect and than add Wave Observer, then work out how you can see both at once so you can play around with it effectively.jamcat wrote: Mon Mar 06, 2023 3:50 amOr you could use a plugin like Wave Observer in your DAW. It’s free.
Anyways, I actually think this is a pretty cool plugin with a lot of uses in your DAW, such as seeing the audio waveform of your mixbuss, to make sure you’re not making sausage.
I might even splurge the 5€ (6.50$) on Wave Observer Pro.
THIS MUSIC HAS BEEN MIXED TO BE PLAYED LOUD SO TURN IT UP